Some days, all you need is a little sweet, creamy escape—and ice cream fits the bill perfectly. Maybe it’s a quick scoop after a long workday, or the smiles that light up your kids’ faces when you bring out dessert before dinner.
(yes, we’ve all done it!).
But if you’ve ever glanced at a store-bought carton, the ingredients list can be… overwhelming. Dairy, stabilizers, gums, artificial flavors—and sugar, lots of it. It makes you wonder: why can’t dessert be indulgent, simple, and a little healthier at the same time?
That’s when I started experimenting in my own kitchen, looking for a lighter, dairy-free version that still tasted rich, creamy, and completely indulgent.
Enter: almond milk ice cream.
It’s simple, wholesome, and customizable. It’s the kind of dessert that makes you feel good inside — not just because it’s lighter and dairy-free, but because it’s made with real ingredients you can pronounce. Almond milk gives it a naturally nutty sweetness, coconut milk adds that luxurious creaminess, and a drizzle of maple syrup ties everything together.
Whether you’re lactose intolerant, vegan, or just trying to cut back on dairy, this recipe is the perfect frozen treat for everyone. And the best part? You don’t even need an ice cream maker.
So, grab your mixing bowl, call the kids over, and let’s make something that’s both nourishing and delicious.
Why I Always Make This Almond Milk Ice Cream
- Creamy and indulgent without the dairy heaviness.
- Customizable — add chocolate, berries, or nuts to make it your own.
- Simple ingredients — no stabilizers, no gums, no weird fillers.
- Vegan, gluten-free, and refined sugar-free (if you use pure maple syrup).
- Kid-approved — because it tastes like the real thing!
Ingredients
For the Base:
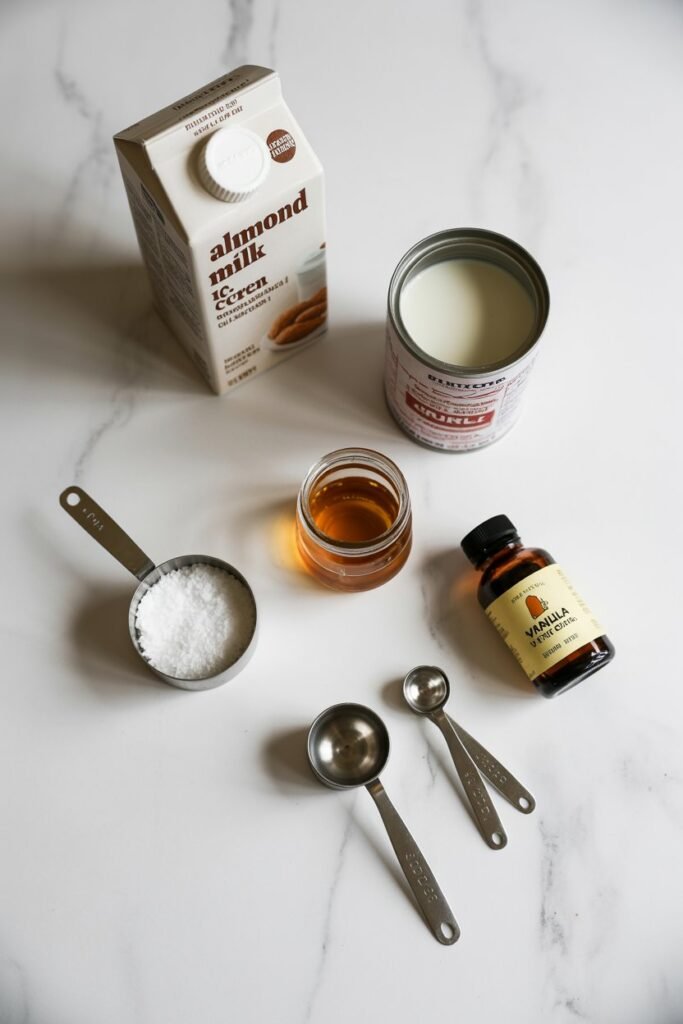
- 2 cups unsweetened almond milk (use a thick, barista-style almond milk for creaminess)
- 1 can (13.5 oz) full-fat coconut milk
- ½ cup pure maple syrup or agave nectar
- 2 tsp pure vanilla extract
- Pinch of fine sea salt
Optional Add-Ins:
- ¼ cup cocoa powder (for chocolate flavor)
- 1 cup frozen strawberries (for strawberry ice cream)
- ¼ cup almond butter (for a nutty twist)
- Vegan chocolate chips, crushed cookies, or fruit swirls for texture
Check Out – 14 Easy Vegan & Dairy-Free Ice Cream Recipes
Step-by-Step Instructions
Step 1: Create the Creamy Base
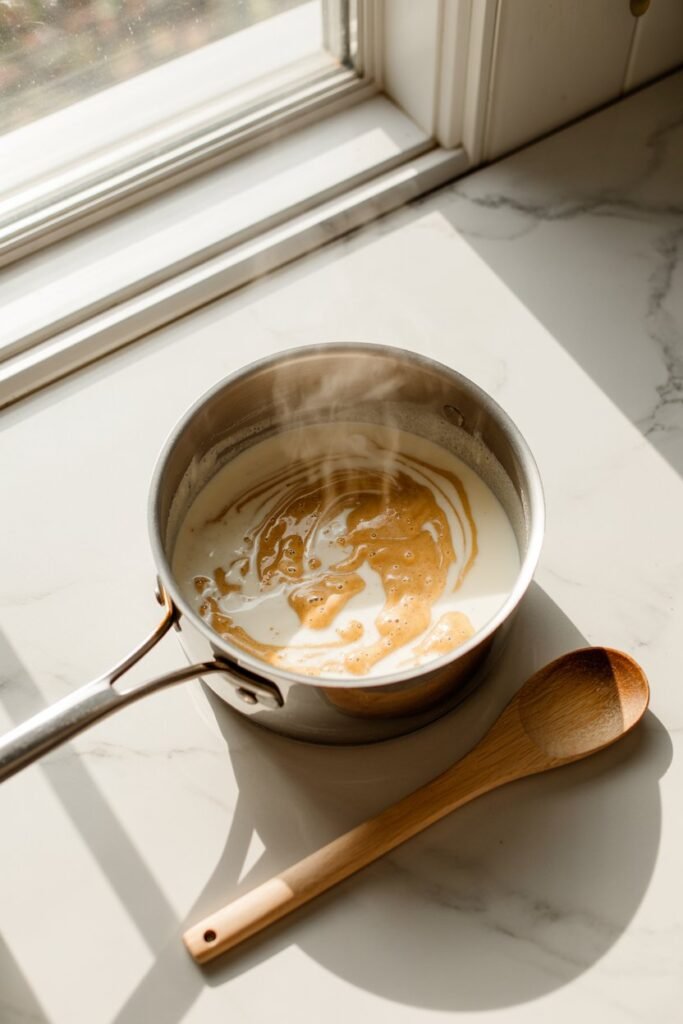
In a medium saucepan, whisk together almond milk, coconut milk, maple syrup, vanilla, and salt. Gently heat over low flame for about 5–7 minutes, just until everything is well combined and slightly warm. This helps the ingredients blend smoothly.
Avoid boiling — you just want the mixture to meld together and thicken slightly.
Pro Tip: Taste the mixture now! If you prefer it sweeter, add another tablespoon of maple syrup or agave.
Step 2: Chill the Mixture
Transfer the mixture to a large bowl, cover it, and refrigerate for at least 4 hours, or overnight for best results. The colder your mixture is, the creamier your final ice cream will be.
If you’ve ever made homemade ice cream that turned icy, this step is what fixes that. Chilling allows the fats to solidify just enough to create that smooth, scoopable texture.
Step 3: Churn or Freeze
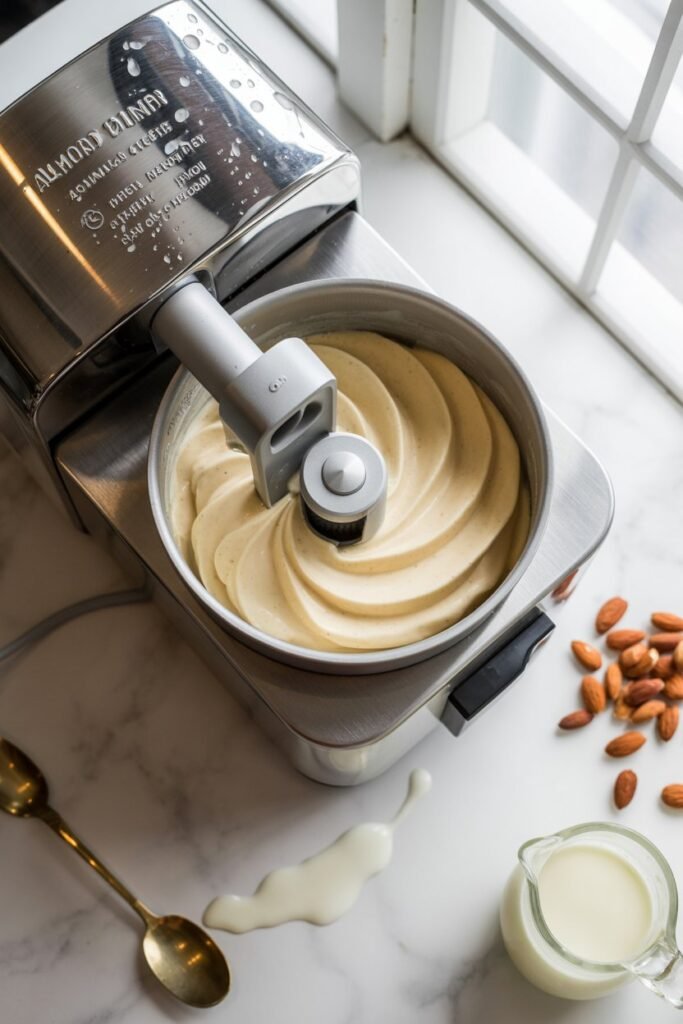
If you have an ice cream maker, pour in the chilled mixture and churn according to your machine’s instructions (usually around 20–25 minutes).
If not, don’t worry — you can still get creamy ice cream without one. Simply pour the mixture into a shallow, freezer-safe container. Place it in the freezer for 1 hour, then whisk or stir with a fork to break up any ice crystals. Repeat every 30–45 minutes for about 3 hours, until it reaches a firm, ice cream-like consistency.
Pro Tip: The more you stir during freezing, the creamier the texture will be.
Step 4: Flavor It Up
This is the fun part — adding your personality!
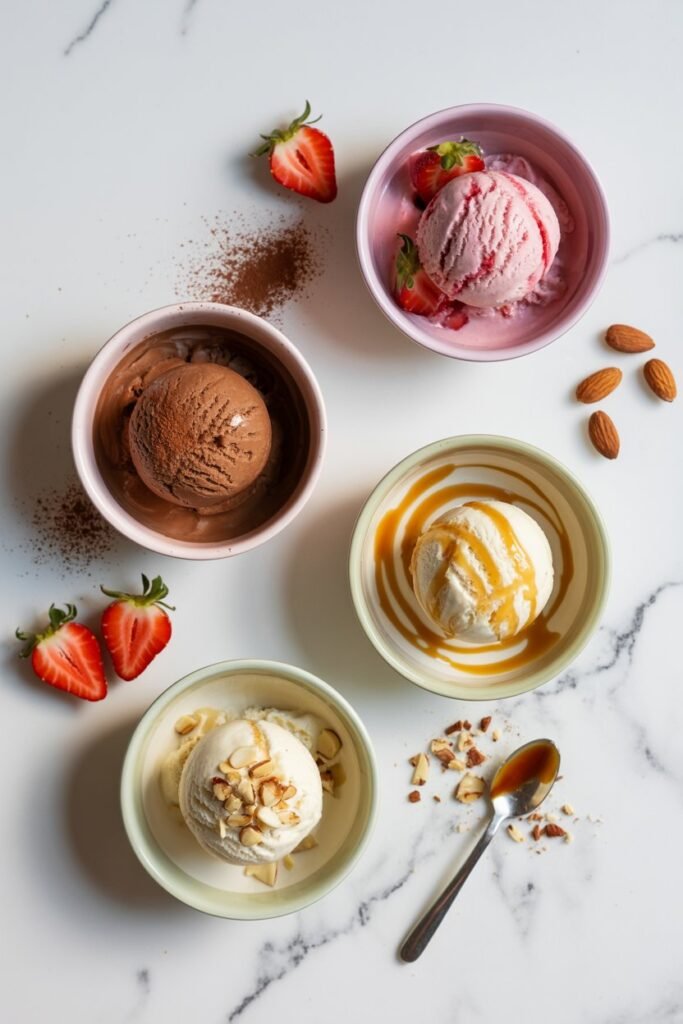
Option 1: Chocolate Almond Milk Ice Cream
Whisk ¼ cup cocoa powder into the base before heating. It adds a deep, rich chocolate flavor that pairs beautifully with almond milk. For extra decadence, swirl in melted vegan chocolate just before the final freeze.
Calories: ~210 per serving
Option 2: Strawberry Almond Ice Cream
Blend 1 cup frozen strawberries into the chilled base before freezing. It gives your ice cream a naturally pink hue and a fruity, summery twist.
Calories: ~180 per serving
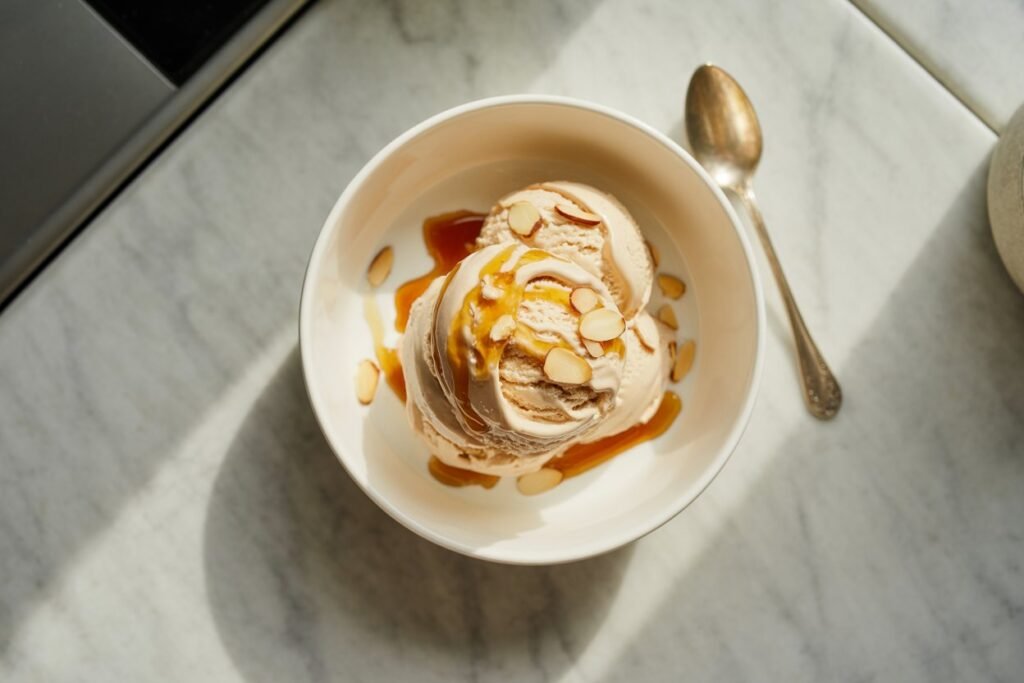
Option 3: Salted Caramel Swirl
After chilling the base, gently swirl in 3 tbsp vegan caramel sauce. Sprinkle sea salt on top before freezing. It’s sweet, buttery, and addictive in the best way.
Calories: ~240 per serving
Option 4: Toasted Almond Crunch
Fold in ½ cup toasted sliced almonds during the last 30 minutes of freezing. That nutty crunch adds the perfect texture contrast to the smooth base.
Calories: ~230 per serving
Step 5: Freeze and Serve
Once your ice cream is thick and creamy, transfer it to a lidded container. Place parchment paper over the surface before sealing — this helps prevent ice crystals.
Freeze for at least 4–6 hours or overnight. When ready to serve, let it sit on the counter for about 10–15 minutes before scooping.
Storage Instructions
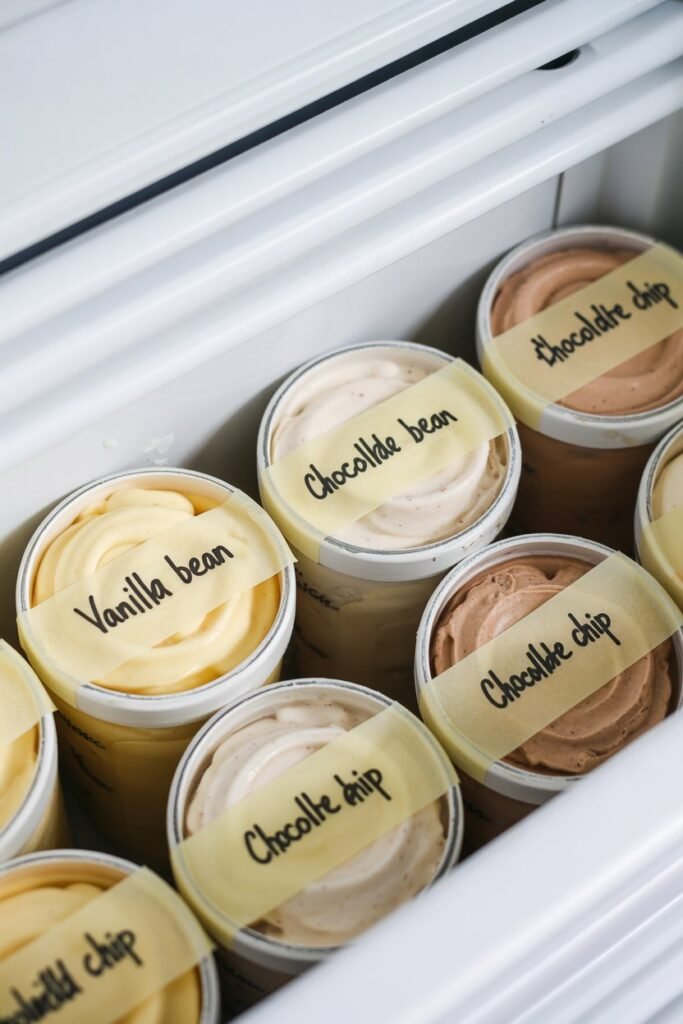
Homemade ice cream tends to firm up more than store-bought, so proper storage matters.
- Store in an airtight container for up to 2 weeks.
- Keep parchment paper on top of the ice cream before sealing the lid.
- To scoop easily, leave the container at room temperature for 10 minutes before serving.
Bonus Tip: If you plan to enjoy it over several days, portion it into individual freezer-safe cups. That way, you only thaw what you need!
Nutrition Information (per serving)
- Calories: ~200
- Total Fat: 12g
- Carbohydrates: 18g
- Protein: 3g
- Sugar: 10g
- Fiber: 1g
All values are approximate and will vary based on mix-ins.
Common Questions
Can I use sweetened almond milk?
Yes, but reduce or skip the added maple syrup to avoid making it too sweet.
What if I don’t like coconut flavor?
Use oat milk instead of coconut milk for a milder taste — it won’t be as rich but still creamy.
Can I make it keto-friendly?
Absolutely! Swap maple syrup for a sugar-free sweetener like monk fruit or erythritol.
How can I make it nut-free?
Use oat milk or soy milk in place of almond milk and sunflower seed butter instead of almond butter.
Personal Tip
“Always chill your base thoroughly before freezing — it makes the texture creamier and prevents ice crystals. A few extra hours of chilling make all the difference.”
Why Homemade Almond Milk Ice Cream is Worth It
When you make your own ice cream, you’re not just making dessert — you’re creating something that’s wholesome, real, and deeply satisfying. You control the sweetness, the creaminess, and the ingredients that go in.
No preservatives. No dairy. No guilt.
It’s one of those recipes that reminds you that simple food can still feel luxurious. And whether you’re enjoying it on your porch on a summer evening or sharing scoops after dinner with your family, it brings that small, sweet joy we all crave.
Final Thoughts
Homemade almond milk ice cream is proof that dairy-free doesn’t have to mean flavor-free. With just a few ingredients and a little patience, you can create something creamy, dreamy, and completely customizable.
Once you try it, you’ll never look back.
So go ahead — pull out that blender, grab your favorite toppings, and make a batch tonight. Because everyone deserves a little frozen happiness, dairy-free or not.
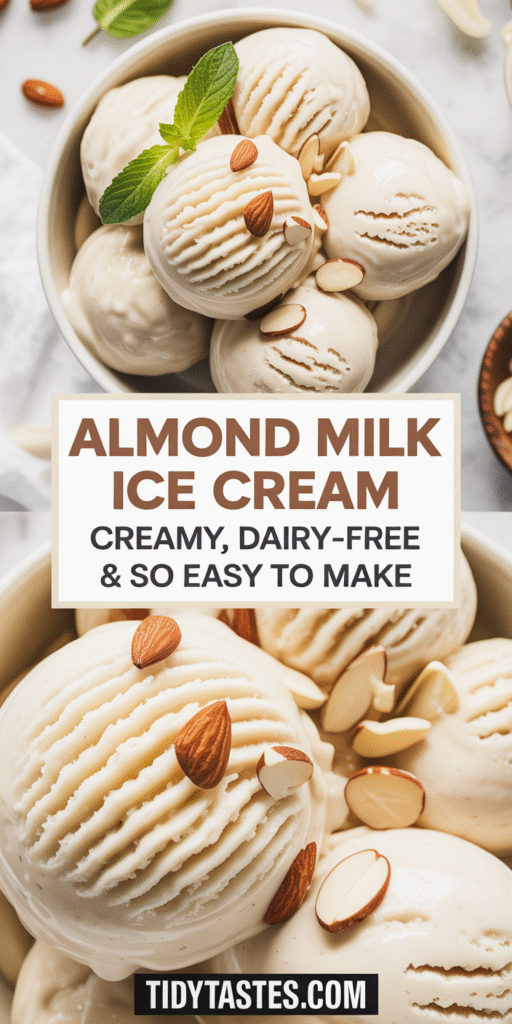
Almond Milk Ice Cream – Creamy, Dairy-Free, and So Easy to Make
Course: Vegan Recipes4-6
servings10
4
minutes150 per ½ cup serving
kcalWhether you’re lactose intolerant, vegan, or just trying to cut back on dairy, this recipe is the perfect frozen treat for everyone. And the best part? You don’t even need an ice cream maker.
So, grab your mixing bowl, call the kids over, and let’s make something that’s both nourishing and delicious.
Ingredients
2 cups unsweetened almond milk
1 cup full-fat coconut milk
½ cup maple syrup or sweetener of choice
1 tsp vanilla extract
Pinch of salt
Optional mix-ins: chocolate chips, berries, nuts, or cookie crumbles
Directions
- In a medium bowl, whisk together almond milk, coconut milk, maple syrup, vanilla extract, and salt until smooth.
- Pour the mixture into an ice cream maker and churn according to the manufacturer’s instructions (usually 20–25 minutes).
No ice cream maker? Pour into a freezer-safe container, stir every 30–45 minutes for the first 2–3 hours to prevent ice crystals. - Stir in optional mix-ins near the end of churning or fold them into the semi-frozen ice cream.
- Transfer to a freezer-safe container and freeze for at least 2 more hours to firm up.
- Scoop, serve, and enjoy!
Notes
- For a richer texture, use full-fat coconut milk.
Adjust sweetness to taste — start with less and add more if needed.
Store in the freezer for up to 1 week; let sit 5–10 minutes at room temperature before scooping for easier serving.