There’s nothing quite like the joy of seeing your pup’s tail wag the moment they sniff something delicious in the kitchen.
I’ve always loved spoiling my dog with treats, but honestly, store-bought biscuits never felt quite right they’re often packed with preservatives and fillers that I don’t want in my furry friend’s diet.
That’s why I started making homemade pumpkin and oat dog biscuits. Not only do I know exactly what’s going in them, but they’re also super simple to whip up.
The pumpkin keeps their tummies happy with fiber and nutrients, oats give a gentle, healthy source of energy, and the fresh herbs add a little flair (and fresh breath bonus!).
These pumpkin and oat dog cookies are one of my favorite go-to recipes for dogs. Pumpkin is naturally rich in fiber and vitamins, making it great for digestion, while oats are gentle on the stomach and provide healthy carbs for energy.
Together, they create a cookie that’s crunchy, nutritious, and pup-approved.
The best part? They’re incredibly easy to make. With just a handful of ingredients, you can whip up a batch in under an hour, and your dog will be waiting by the oven as soon as they catch a whiff.
Ingredients
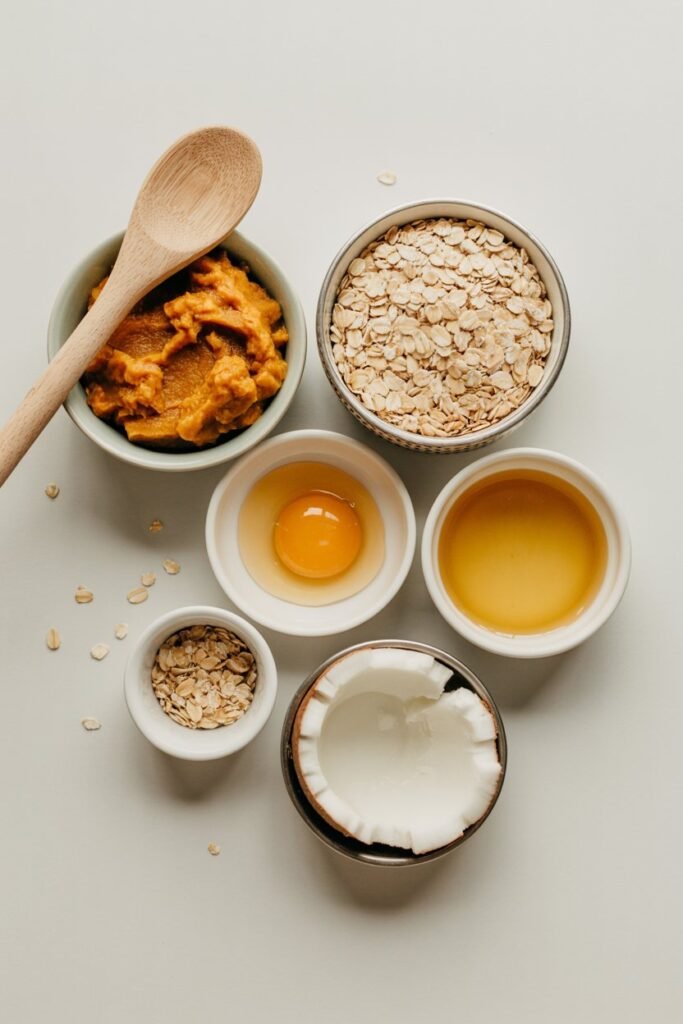
- 1 cup pumpkin puree (plain, not pie filling)
I always use plain pumpkin because it’s gentle on my pup’s stomach and naturally packed with fiber and vitamins. It keeps the biscuits moist and flavorful without any added sugar. - 2 ½ cups old-fashioned oats (ground into flour or left whole for texture)
Oats are my go-to for healthy carbs. I like grinding half into a flour for structure and leaving the rest whole for a little crunch that my dog loves. - 1 egg
This helps bind everything together while adding extra protein for a wholesome treat. - 2 tablespoons coconut oil (melted)
Coconut oil adds healthy fats and helps make the biscuits tender. I usually melt it so it mixes evenly with the pumpkin. - 1 tablespoon honey (optional)
I sometimes add a touch of honey for a hint of sweetness—but it’s totally optional. Your pup will love these even without it!
Step-by-Step Instructions
Step 1: Preheat the oven
Before you start mixing, I like to get my oven ready so everything goes smoothly. Preheat your oven to 350°F (175°C)—this ensures the biscuits bake evenly from the moment they go in.
While it’s warming up, line a baking sheet with parchment paper. This keeps the biscuits from sticking and makes cleanup a breeze. I always do this step first so I can focus on shaping the biscuits without rushing.
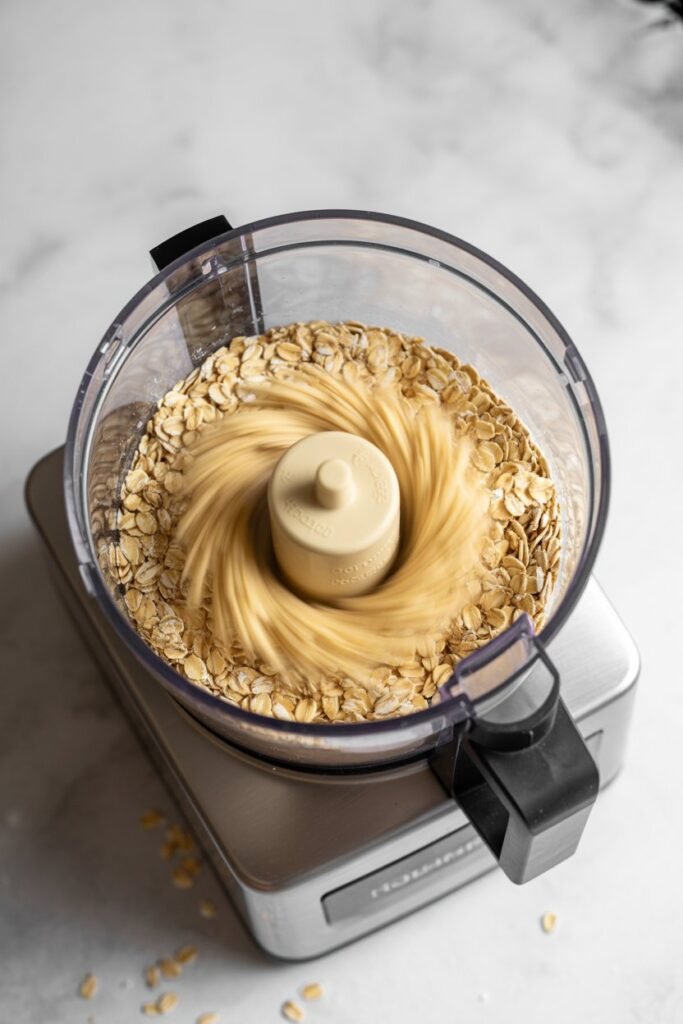
Step 2: Prepare the oats
If you like your dog biscuits a bit smoother, I recommend blending or processing 2 cups of the oats into oat flour. This gives the cookies a softer, more uniform texture while still keeping them wholesome.
I usually leave the remaining ½ cup of oats whole—it adds a nice bit of crunch that dogs love and makes each bite a little more interesting. Mixing these two textures gives you the best of both worlds: soft, hearty, and totally paw-approved!

Step 3: Mix wet ingredients
In a large mixing bowl, combine the pumpkin puree, egg, melted coconut oil, and honey (if you’re using it). I like to give everything a good stir until the mixture is completely smooth and well combined.
At this stage, the pumpkin gives the dough a lovely natural sweetness and moisture, while the coconut oil adds a subtle richness that makes the biscuits extra tasty for your pup. Taking a moment to mix thoroughly ensures every cookie has that perfect, consistent texture.
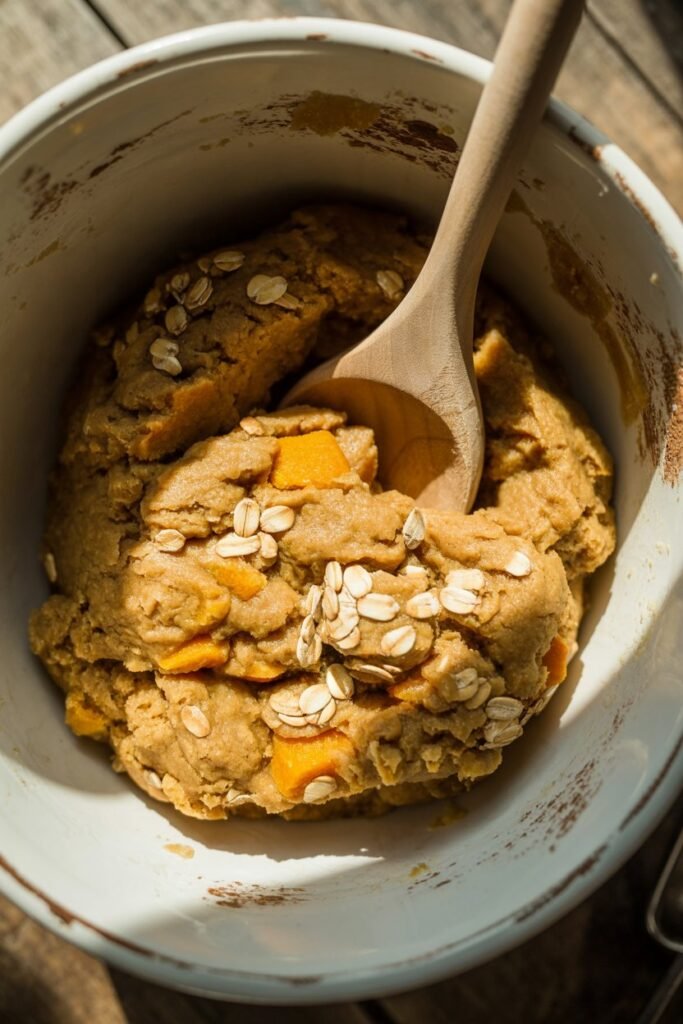
Step 4: Add oats
Gradually stir in the oats (both the ground oat flour and the whole oats for texture) into your pumpkin mixture. I like to fold them gently so the dough comes together without overworking it.
The oats add structure and a nice chewiness, while still keeping the biscuits wholesome and digestible for your pup. You’ll notice the dough start to thicken and hold together—this is exactly what you want before shaping your cookies.
Step 5: Shape the cookies
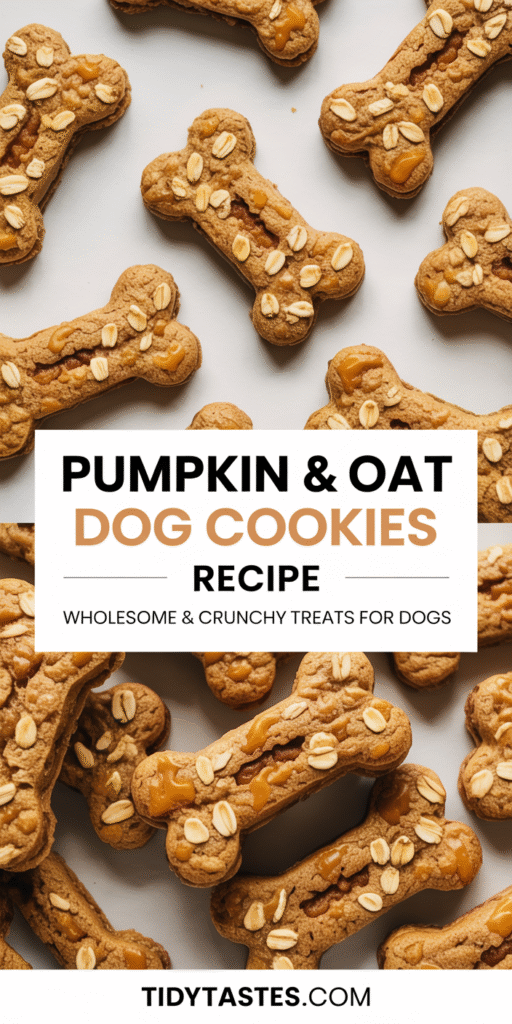
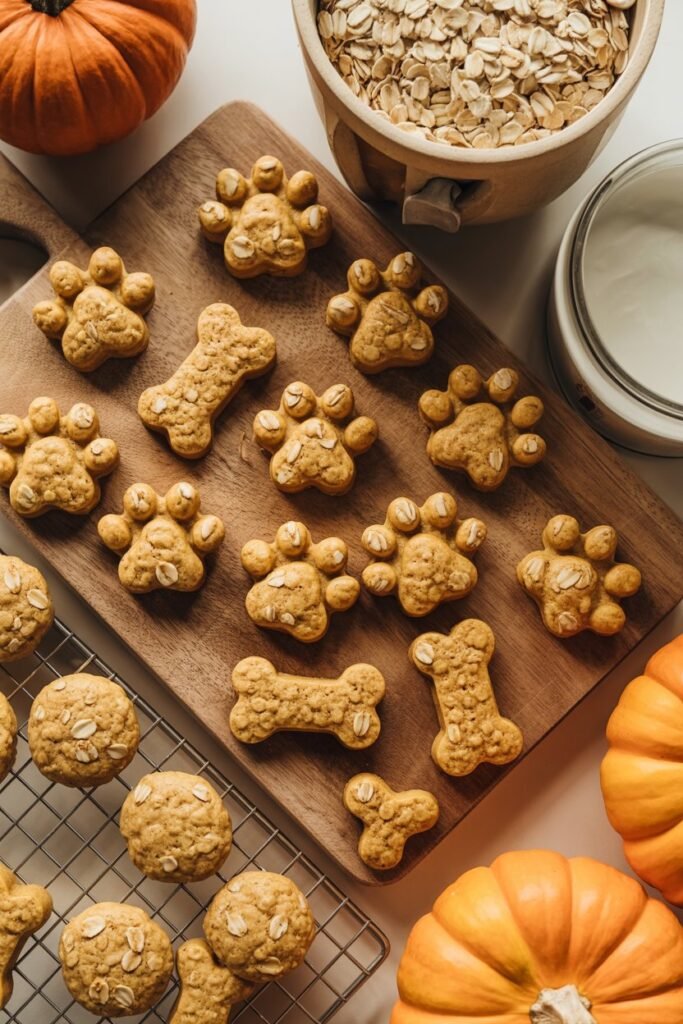
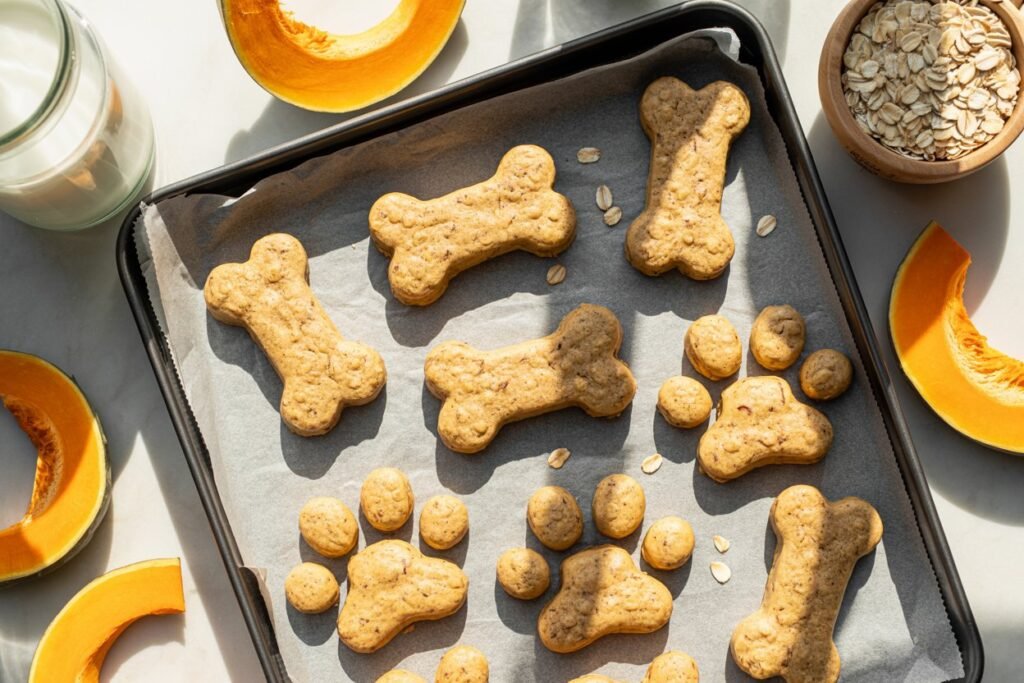
Take small portions of the dough and roll them into bite-sized balls—perfect for training treats—or use cookie cutters to create fun shapes like bones, hearts, or even paws. I love using the cookie cutters because it makes snack time extra special and Instagram-worthy!
Place each shaped cookie onto the prepared baking sheet, leaving a little space between them so they bake evenly. You’ll start to see your batch taking shape, and your pup might already be sniffing around, excited for these homemade goodies.

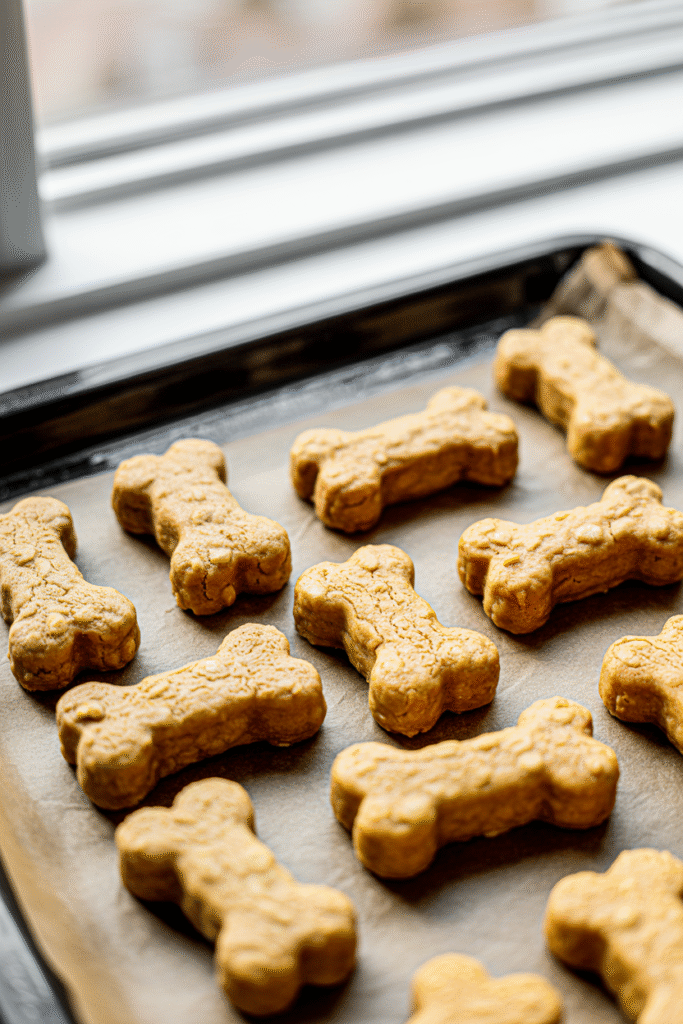
Step 6: Bake
Pop the baking sheet into your preheated oven at 350°F (175°C) and let the cookies bake for 25 to 30 minutes. You’ll know they’re ready when they’re firm to the touch and have a lovely golden-brown color.
The aroma of pumpkin and oats will fill your kitchen, and your dog will probably be circling impatiently! Trust me, it’s worth the wait. Baking them until firm ensures they hold their shape and get that satisfying crunch your pup will love.
Step 7: Cool and store
Once your cookies are baked to golden perfection, let them cool completely on a wire rack. This ensures they firm up just right and are safe for your pup to munch on.
I usually keep a batch in an airtight container for up to a week—perfect for everyday treats—or freeze extras for up to three months so you always have homemade goodness on hand. Your dog will thank you every time!
Why I Love These Pumpkin Oat Cookies for Dogs
I love giving these cookies to my pup because they’re not only tasty but also good for them. You’ll notice how much your dog enjoys them straight out of the oven the smell alone gets tails wagging.
Pumpkin is one of my favorite ingredients because it supports healthy digestion and is gentle on sensitive tummies.
Oats provide fiber and energy without feeling too heavy, which makes them perfect for snacking.
I also include a little coconut oil, which I’ve found helps keep my dog’s skin healthy and coat shiny. The cookies come out crunchy, flavorful, and totally irresistible for any dog.
Tips and Variations
I love experimenting with these pumpkin oat cookies, and you can too. You and I can make small tweaks that keep things fun and tasty for your dog.
Add Peanut Butter – I sometimes stir in a tablespoon of unsweetened peanut butter (make sure it has no xylitol). It adds a rich flavor that dogs absolutely love.
Sprinkle Cinnamon – A pinch of cinnamon gives the cookies a cozy, seasonal twist. I like to use it especially around fall when pumpkin flavors really shine.
Fun Shapes – I use silicone molds shaped like paws or bones for a playful presentation. You’ll see your pup’s excitement when they recognize the fun shapes.
Bite-Sized Cookies – I often make smaller cookies to use as training rewards. You and I can keep a batch handy for treats without overdoing it.
Frequently Asked Questions
Can I use quick oats instead of old-fashioned oats?
Yes, but old-fashioned oats provide more texture. Quick oats will make softer cookies.
Are these cookies safe for puppies?
Yes, in small amounts. Just be sure your puppy is eating solid food comfortably.
How many can I give my dog per day?
One or two cookies is plenty for most dogs. Treats should not replace a balanced diet.
Can I make these without eggs?
Yes, substitute the egg with 2 tablespoons of unsweetened applesauce or mashed banana.
Pumpkin and Oat Dog Cookies Recipe
Course: Dog TreatsCuisine: Homemade Pet FoodDifficulty: BeginnerAbout 20–25 cookies
servings10
minutes25
minutes60 kcal per cookie (depending on size)
kcalWholesome, crunchy, and naturally sweet, these homemade pumpkin and oat cookies are packed with fiber, gentle carbs, and healthy fats. Perfect for rewarding your pup with a nutritious treat.
Ingredients
1 cup pumpkin puree (plain, not pie filling) – Great for digestion and packed with fiber and vitamins.
2 ½ cups old-fashioned oats (ground into flour or left whole for texture) – Provides gentle carbs and adds structure.
1 egg – Binds the dough together and adds protein.
2 tablespoons coconut oil (melted) – Adds healthy fats for shiny coats and soft cookies.
1 tablespoon honey (optional) – A touch of natural sweetness that dogs love.
Directions
- Preheat Oven
Set your oven to 350°F (175°C) and line a baking sheet with parchment paper. - Prepare the Oats
If you prefer a smoother cookie texture, blend or process 2 cups of oats into oat flour. Leave the remaining ½ cup whole for extra crunch. - Mix Wet Ingredients
In a large mixing bowl, combine pumpkin puree, egg, coconut oil, and honey. Stir until smooth and well-combined. - Add Oats
Fold in the oat flour and whole oats until a dough forms. It should be slightly sticky but manageable. - Shape the Cookies
Roll the dough into small balls or use cookie cutters to make fun shapes like bones or hearts. Place them on the lined baking sheet, leaving a little space between each cookie. - Bake
Bake for 25–30 minutes until the cookies are firm and lightly golden. - Cool and Store
Allow cookies to cool completely on a wire rack. Store in an airtight container for up to one week, or freeze for up to three months for long-term treats.
Tips for Success
Texture preference: Adjust the oat flour vs. whole oats ratio for softer or crunchier cookies.
Size matters: Make smaller cookies for training treats, larger for snacks.
Flavor add-ins: Dogs enjoy a pinch of cinnamon or a few finely chopped carrots—just avoid anything toxic like chocolate or raisins.
Final Thoughts
Homemade pumpkin and oat dog cookies are a simple way to spoil your furry friend with something healthy and delicious. With just a few pantry staples, you can bake a treat that supports their digestion, gives them energy, and makes them one very happy pup.
Next time you’re in the kitchen, skip the store-bought biscuits and try these instead. Your dog will thank you with wagging tails and lots of love.